
Maintaining a reliable home heating setup requires more than just adjusting the thermostat and hoping for cozy winters. Beneath the surface of radiant baseboards and pipe loops, recirculating water constantly interacts with different metals. Without proper care, this interaction creates problems that drive up energy bills and shorten equipment life. Taking control of your plumbing through hands on improvements keeps your living space warm while saving significant money over time.
Adding protective treatments can sound intimidating, but practical DIY techniques make it manageable. By introducing the right equipment into your utility area, you can easily handle routine water maintenance without hiring expensive contractors for every minor fluid adjustment.
Why your home heating system needs chemical protection?
Closed loop hydronic setups rely on recirculated water to transfer warmth from a central boiler to radiators or underfloor loops throughout your house. Because this fluid remains inside the network for months or years, natural chemical reactions occur continuously. Oxygen dissolved in fresh fill water reacts aggressively with iron, steel, copper, and brass components. Over time, this oxidation produces black iron oxide sludge, commonly known as magnetite.
As magnetite accumulates, it settles in low flow areas such as the bottom of radiators and the heat exchanger inside your boiler. This sludge acts as an insulating barrier, forcing your burner to work harder to generate the same heat output. Furthermore, scale deposits from hard water minerals coat pipe interiors, restricting circulation and stressing circulator pumps. Introducing corrosion inhibitors and biocides creates a microscopic protective shield across internal surfaces, balancing pH levels and neutralizing harmful electrolytic reactions before they cause pinhole leaks.
What a chemical dosing pot actually does?
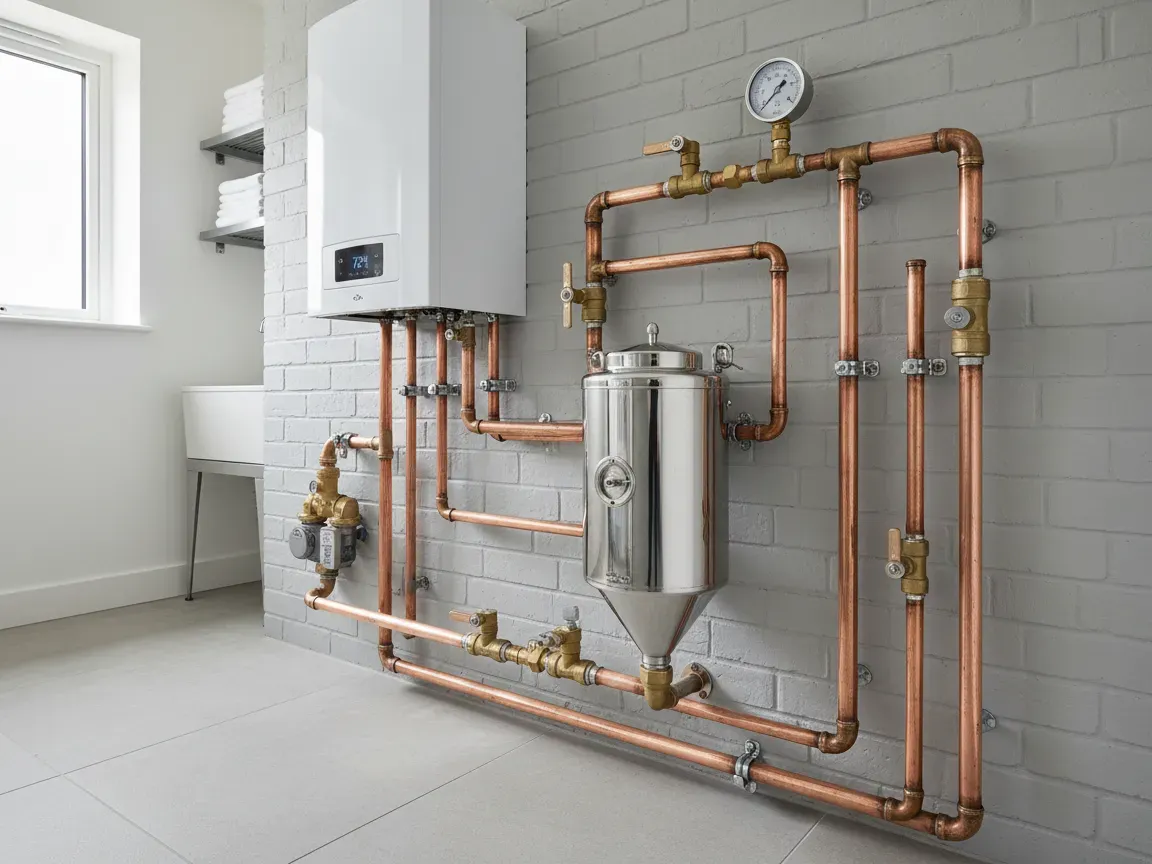
A chemical dosing pot is a robust steel cylinder installed across the flow and return pipes of a heating loop. Operating as a side stream bypass device, it allows homeowners to introduce liquid treatments directly into a pressurized circuit without depressurizing or draining gallons of treated water. The unit typically features four primary valves: an inlet valve, an outlet valve, a drain valve, and an air vent valve, along with a top filling funnel.
When you need to replenish inhibitors or add system cleaners, you temporarily isolate the vessel from the main circulating line. You pour your chosen treatment into the reservoir and close the fill valve securely. When you open the isolation valves, the natural pressure differential across the heating circuit forces system water through the vessel, sweeping the chemicals directly into the active circulation. Investing in a durable stainless models like https://culmstoreseltermltd.co.uk/en_GB/c/Chemical-Dosing-PotsINOX-Chemical-Dosing-Pots/57 ensures your setup withstands internal pressures and corrosive additives for decades.
Essential steps to install the unit safely
Installing a dosing pot is an achievable project for skilled DIY enthusiasts who possess basic pipe fitting skills. The best location for installation is in the mechanical room or basement, connected between the main circulation pump supply and return headers. This placement takes advantage of the differential pressure created by the circulator, ensuring quick and complete chemical dispersion.
Begin by turning off the power to your heating system and allowing the water temperature to drop to a safe level. Isolate the section of pipe where you plan to install the bypass connections. Cut into the supply and return lines, installing dedicated isolation ball valves and non return valves to prevent backflow into municipal water lines. Connect rigid copper or steel piping from these tap points to the inlet and outlet ports of your dosing pot.
Anchor the cylinder securely to a masonry wall or sturdy floor stand, as a unit filled with liquid carries considerable weight. Ensure the top funnel sits at an accessible height for pouring fluids comfortably. Once connections are tight, slowly open isolation valves to check for drips, and use a pressure gauge to confirm system integrity before restoring electrical power.
How to add water treatment chemicals into your system?
Once installed, dosing your system takes only a few minutes. Follow a straightforward valve sequence to introduce protective formulas cleanly:
- Ensure the dosing pot isolation valves connecting the unit to the main heating lines are completely closed.
- Open the bottom drain valve to empty any stagnant water out of the pot into a bucket, then close the drain valve.
- Open the top fill valve and the air vent valve to equalize pressure inside the cylinder.
- Pour your measured chemical inhibitor or cleaning solution directly into the top funnel until the pot is filled to the required volume.
- Close the top fill valve tightly and seal the manual air vent valve.
- Slowly open the bottom inlet valve to introduce pressurized system water into the pot.
- Open the top outlet valve so circulating fluid carries the chemicals into the broader pipework.
Leave both isolation valves open for roughly thirty minutes to ensure complete circulation through every baseboard and radiator loop.
Common mistakes to avoid during the dosing process
Even experienced DIYers can make minor errors that reduce the effectiveness of their chemical treatments. One frequent mistake is pouring chemicals into an unvented pot, which causes air locks and messy splash back from the funnel. Always open the manual air vent before pouring liquid into the vessel.
Another misstep is failing to match chemical dosage to the total water volume of the home. Underdosing leaves metal surfaces partially exposed to galvanic corrosion, while overdosing wastes expensive products without adding extra defense. Calculate your system capacity beforehand by counting radiator units and pipe lengths, or consult boiler documentation for estimated water capacity.
Finally, avoid mixing incompatible chemical formulas in the cylinder at the same time. If you use a heavy duty flushing agent to remove old scale, circulate and drain that cleaner completely before refilling the system and introducing a permanent corrosion inhibitor.
Simple habits that keep your heating running smoothly year round
Maintaining heating efficiency does not stop after adding inhibitor. Test your water chemistry annually using an inexpensive test kit or digital conductivity meter. These tests reveal whether inhibitor concentration has diluted due to minor pressure top ups throughout the winter. If levels drop, top up through your dosing pot immediately.
Make it a habit to bleed trapped air from upper floor radiators every autumn. Air pockets reduce heating efficiency and introduce fresh oxygen that accelerates rust. Check the system pressure gauge on your boiler monthly to detect hidden pressure drops early. By pairing routine water conditioning with simple visual inspections, your home stays consistently comfortable while your utility equipment runs smoothly for years to come.
Protecting your heating investment pays off every winter
Taking charge of your home water quality transforms how your heating equipment performs when freezing temperatures arrive. A small investment of time spent installing a dedicated bypass unit eliminates the messy chore of draining lines just to add protective chemicals. Clean piping and balanced water chemistry translate directly into lower gas consumption, quieter pipes, and fewer emergency service calls.
Approaching home maintenance with practical plumbing upgrades provides long term peace of mind and builds confidence in your technical abilities. By making routine dosing a standard part of your seasonal preparation, you preserve the comfort of your living space while safeguarding expensive heating equipment for decades.